 by
by 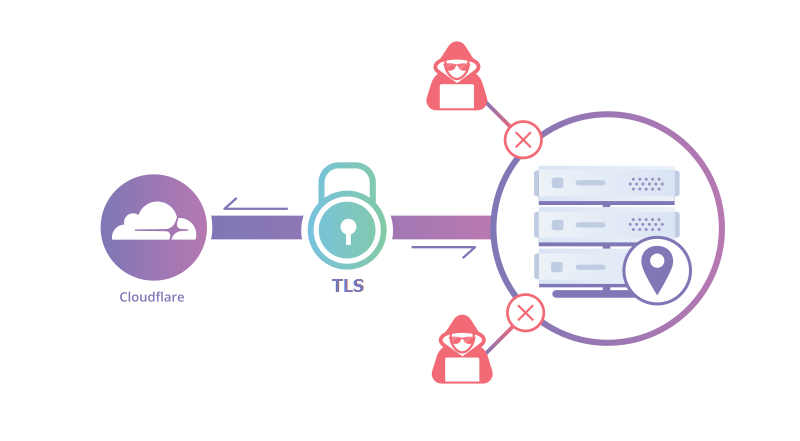
When using Cloudflare as your DNS-provider you can set-up secure encrypted tunnels from your own location to Cloudflare. This Cloudflare tunnel can then be used to route your domain’s dns-names back to your own location. All without the need to open up any ports in your firewall or router. A Cloudflare tunnel can be used with a Traefik reverse proxy.
In my setup I used to forward port 443 to my Traefik reverse proxy. Traefik in turn forwarded the incoming traffic to the respective internal server or service. Traefik also uses a Cloudflare API to automatically renew the wildcard certificates for my domain names with Let’s Encrypt. This post will explain how to start using a Cloudflare tunnel with Traefik.
Port forwarding will work in many circumstances, but not always. More and more internet service providers are switching to what is called carrier-grade NAT or CGNAT. When your ISP uses CGNAT, you don’t have a publicly routeable IP-address anymore and port-forwarding will no longer work. Also opening up ports in your router always brings some risks since your basically poking a hole in your network.
Setting up a Cloudflare tunnel solves both of these challenges. Cloudflare has a pretty good explanation on how this works and there are many websites that also describe how this is done. However I wanted to keep using Traefik for two main reasons. The first reason is that I also use Authelia middleware to authenticate with MFA to some of my sites that are not meant for public access. The second reason is that with Traefik still in place I can use my internal DNS to directly keep pointing to the internal Traefik server. By doing this, I reach these services directly rather than traveling through the Cloudflare network back home.
Setting up the Cloudflare tunnel for use with Traefik involves the following steps:
Installing cloudFlared
Visit this site to download the tunnel software or read more information about this software. I have been using the Linux version which I installed using the Debian package manager dpkg. After installing the software you can go to the next step.
Login to Cloudflare using the installed software
Login to your Cloudflare account with the following command:
cloudflared tunnel login
This command will generate a URL that you can copy/paste in a webbrowser to login to your Cloudflare account. When I logged in to my account nothing happened after loggin in. If that happens to you then after logging in, paste the URL once more to continue to choose the domain name to use and confirm with the Authenticate button.
Right after authenticating, the login command that was still waiting should automatically stop and it will create a certificate with a private key. In Linux it will store this file in ~/.cloudflared/cert.pem. Since this is contains a private key, be sure to store it safely and make sure only you can access this file. This file will give access to your Cloudflare settings.
The next step is to create the tunnel.
Create the Cloudflare tunnel
To create the tunnel (with name tunnel1) enter the following command:
cloudflared tunnel create tunnel1
This command will generate the tunnel using a hexadecimal tunnel-ID and it will create a .json file with that same number. Also keep this file safe since this file also contains some secrets.
Create the configuration file to connect your Cloudflare tunnel to Traefik
After logging in and creating the tunnel, it’s time to create the configuration file. This file determines which domain names are in use and where to send traffic arriving to this name. This will send traffic for the Cloudflare tunnel to your Traefik reverse proxy.
In the first line you need to enter the same tunnel name that you used when creating the tunnel (in my example above this was tunnel1. In the second line you need to point to the .json file that was created earlier.
tunnel: tunnel1
credential-file: /home/username/.cloudflared/<tunnelid>.json

ingress:
  - hostname: host1.domainname.com
    service: https://localhost:443
    originRequest:
      originServerName: 'domainname.com'
  - hostname: host2.domainname.com
    service: https://localhost:443
    originRequest:
      originServerName: 'domainname.com'
  - service: http_status: 404
After the first two lines you need to configure the ingress rules. In my example I created two incoming DNS names (host1.domain.com and host2.domain.com).
For each entry you need the following settings:
- hosname: this is the DNS name that you want to use
- service: this should point to your Traefik HTTPS port which in my situation is on the same Linux machine and therefore I can use localhost.
- originRequest.originServerName: this is the name on the certificate on your Traefik reverse proxy. In my case I have a wildcard certificate and can point this to just ‘domainname.com’ (of course using my own domainname just like in the hostname entries).
Be aware that this is a YAML file, so watch the indentation. Each deeper level needs to indent from the previous and indentation should be exactly the same on each line for the same level. So each – hostname should indent exactly the same.
The last line with - service: http_status: 404 is to serve every name coming into the tunnel that you didn’t define with a 404 page not found page.
Save this file as config.yml or config.yaml.
After all files were created I moved them to /etc/cloudflared and made sure that only the correct user has access to the files (chmod 600 on files and 700 on the folder)
Configure the tunnel DNS
To make your DNS entries use the tunnel they will have to be created (or adjusted if they point to your IP-address). For records that do not already exist you can do this from the commandline:
cloudflared tunnel route dns tunnel1 host1.domainname.com
Repeat this for every DNS-record that needs to be created.
This command uses the .json and certificate files that were created earlier to configure a CNAME record. This record for host1.domainname.com will point to: <your-tunnel-id>.cfargotunnel.com.
When you currently already have a DNS-record this command may fail and you have to configure the entry manually from the Cloudflare website.
If you currently have an A-record then you need to delete this record and create a new CNAME record which should point to <your-tunnel-id>.cfargotunnel.com.
Install cloudflared as a service
Next you’ll want to install cloudflared as a service so it will restart automatically after a reboot. To do this in Linux enter the following command:
sudo cloudflared service install
sudo systemctl restart cloudflared
The first line installs cloudflared as a service and the second line (re)starts the service bringing the tunnels up.

Hi, great thread. Wondered if you could elaborate on how you achieved the following possibly please?
“The second reason is that with Traefik still in place I can use my internal DNS to directly keep pointing to the internal Traefik server. By doing this, I reach these services directly rather than traveling through the Cloudflare network back home.”
I have a CloudFlare tunnel and Traefik reverse proxy set up, but want to localise the traffic as you summarised.
Cheers
Rob
You just need to run an internal DNS-server on your own network, having the same DNS-records as you have on your public DNS-service but then pointing to your internal IP-address.