
 by
by Recently I read about Proxmox Virtual Environment (Proxmox VE or PVE). Proxmox VE is a virtualization platform that is free to use in a home network. It allows you to create virtual machines and Linux containers.
Since my Sophos XG firewall was running bare metal on an ageing computer, it became time to replace that machine. I could have easily bought or built myself a new machine and install Sophos XG firewall on it again. However I would like to virtualize my future the firewall so I can use the machine for more than just a firewall.
This was the perfect time for me to try out Proxmox VE. After testing Proxmox VE for a short while I was convinced that this solution will fit my future needs.
Installing Proxmox Virtual Environment
Installing Proxmox VE is very simple. First visit the Proxmox website and download the software. Beware that Proxmox will “claim” the entire computer. It is therefore not possible to use it together with an existing operating system from the download. Transfer the downloaded ISO image to a USB disk and boot the computer with it. A tool like Rufus or Ventoy is useful for making a bootable USB disk.
It is possible to use an existing Linux machine and extend this install with Proxmox VE. However the advise is to only use the physical machine for Proxmox VE and nothing else.
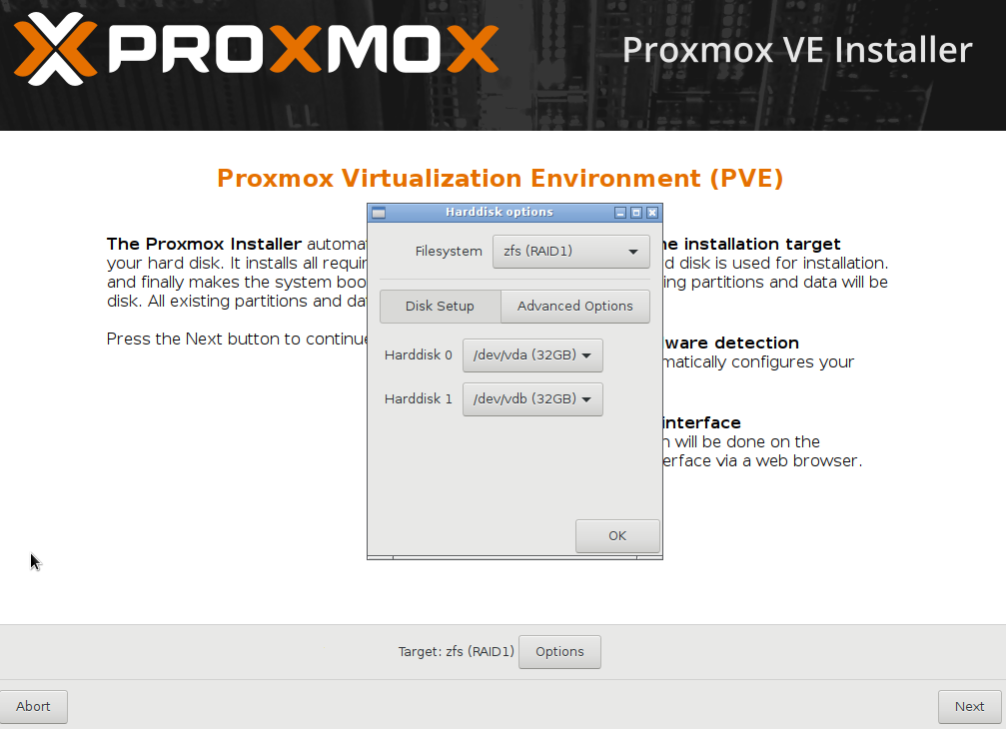
Installation is pretty straight-forward. The only important choice is to select where to install Proxmox VE. Since the install will likely host multiple operating systems, it makes sense to install on a RAID configuration. This is possible straight from the installer when at least two drives are available in the computer.
Managing Proxmox VE
After installing Proxmox VE, open a browser and head to https://<ip-address>:8006 to open the management interface.
From the management interface you can add additional (networked) storage, create virtual machines and containers and manage the entire installation.
When using the free version at home it is important to change to the free repositories. By default PVE will use the preconfigured enterprise update repositories. These repositories are only accessible with a valid subscription to Proxmox and updating the software from this repository is not possible without a subscription.
If you use Proxmox in a business then I think you should consider a subscription. These are not too expensive and it helps in future development of the software. In a home lab it is perfectly acceptable to use the software without a subscription in my opinion.
Changing to the free repository and update the software
Changing this setting can be done by opening a console session and changing the update file. You can open the console either with a SSH program or by clicking on the shell button in the management website.
The easiest way to open the file is by using the nano editor in the Linux operating system. To open the file enter the following command:
nano /etc/apt/sources.list
This will open the editor with the sources.list file already opened. You should add the pve-no-subscription line to this file before saving it again:
deb http://ftp.debian.org/debian buster main contrib
deb http://ftp.debian.org/debian buster-updates main contrib

# PVE pve-no-subscription repository provided by proxmox.com,
# NOT recommended for production use
deb http://download.proxmox.com/debian/pve buster pve-no-subscription

# security updates
deb http://security.debian.org/debian-security buster/updates main contrib
You can save and close this file after editing by pressing CTRL-X to close the editor. The editor will ask you if you want to save the file. Enter ‘Y’ and enter to save and close the file.
You can now immediately update the software by entering the following command:
apt-get update && apt-get dist-upgrade
These are actually two commands in one line. The first command updates the list with packages. The second command starts the actual update.
If there are any updates you can review them and enter ‘Y’ again to install them. Consider rebooting the computer after updating the computer. Especially if you have just installed PVE.
