 by
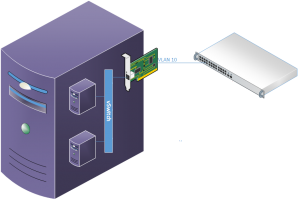
by In my life as a network administrator I work with routers, switches and firewalls a lot. Sometimes I need to test some things out, build a proof-of-concept or just want to educate myself. And at these times you sometimes come to the conclusion that you either need more physical NICs in your laptop or you need VLANs in your virtual environment just like in the physical environment. That is when you can really use a Hyper-V trunk.
That’s the time you usually dive into the settings of Hyper-V and it’s Virtual Switch Manager only to find that the VLAN settings that you do find are not the ones you are looking for and you can’t find any settings for managing a trunk.
Fortunately Hyper-V is definitely capable of configuring virtual NICs with multiple VLANs. You won’t find it in the GUI however, but you’ll need to switch to PowerShell.
In this use case I will describe a scenario to build a virtual firewall with three network interfaces; one LAN-interface, one WAN-interface and a DMZ-interface. The WAN-interface will be connected to an external V-Switch because it should communicate with the “outside world”. For the other two interfaces I will only use a single NIC connected to a (10Gbps) Private V-Switch that is more than capable to handle both the internal DMZ networks.
Starting up PowerShell
To add the virtual machine, issue the following command:
$VM=New-Vm -Name Firewall -MemoryStartupBytes 4GB -NewVHDPath C:\Temp\VM\Disks\Firewall.vhdx -Path C:\Temp\VM\ -NewVHDSizeBytes 10GB -Generation 2
Next step to add a DVD-drive to the VM:
$DVD=Add-VMDvdDrive -VMName $VM.VMName -Path C:\Temp\VM\ISO\Firewall.iso
Finally set the DVD as boot device and in this case disable secure boot:
Set-VMFirmware -VM $VM -FirstBootDevice $DVD -EnableSecureBoot Off
With the machine finished, what I like to do is to delete the default vNIC:
Remove-VMNetworkAdapter -VMName $VM.VMName -Name "Network Adapter"
Next add two (or more) new NICs:
For ($Count=0; $Count -le 1; $Count ++)
{
Add-VMNetworkadapter -VMName $VM.VMName -Name "Eth$Count"
}
By first dumping the default “Network Adapter” and then creating the new NICs, the NICs will each have a unique name.

Configure the Hyper-V trunk and VLANs
Now we want to use Eth0 for the LAN and DMZ interfaces and Eth1 for WAN interface. So we will convert Eth0 to a Trunk interface and configure all the VLANs that we (might) need. Usually the native VLAN should be 0 as it is by default. Only in specific cases it might be needed to choose a different native VLAN.
Set-VMNetworkAdaptervlan -VMName $VM.VMName -VMNetworkAdapterName "Eth0"-Trunk -AllowedVlanIdList "10, 20, 30" -NativeVlanId 0
We then have exactly what we need:

Be careful: Do not change the VLAN properties of the NIC in the Hyper-V GUI, because the GUI cannot cope with the trunk port. If you change the VLAN of the NIC in the GUI, then the trunk port will be converted to an access port in the VLAN specified in the GUI.
If you like this post, you may also like my other posts about PowerShell.

If your Hyper-V host is connected to a switch port that is already configured as a trunk then your external bridged virtual switch and VMs will already be connected to a physical trunk port. They will get the native VLAN of the physical trunk port if you do not assign a VLAN ID specifically to them. You can then configure a separate virtual switch with any VLAN ID that is passed down by your physical trunk port connected to your Hyper-V server. Each VM NIC will get it’s own VLAN ID without requiring any PowerShell. It’s all configurable in the GUI.